cuipeng202's blog
When you're playing a game, you may come across bosses or difficult levels that make you feel a headache, sad, or give up. Although you face these setbacks, the most important thing to remember is that they are designed obstacles, they will not stop you, and they are the only way to success. All obstacles can be overcome by improving skills, creativity or just relaxing and getting back in good shape.
What You Must Know Before Combat
The green life bar below the red life bar is the core of the battle. All the sprint, dodge, and block attacks that will be used in the fight will consume the energy of the green life bar. When the green life bar is exhausted, all combat operations will be exhausted. Without stamina, this is very important.
Basic combat flow
In the event of an attack you can't react to, use R3 to lock it, and use L1 to raise the shield simultaneously, which can effectively block the damage. When using a shield to block damage, it will quickly consume stamina. When attacking, you must put down the shield to recover quickly.
Now, slow attacks will consume your stamina, and rolling can help us avoid damage and improve stamina efficiency. You should be wearing the ultimate most defensive armor possible while keeping your equipment load below 70% for your roll to be quick and effective.
When fighting, you should pay attention to the enemy's position and movement trajectory, find ways to avoid enemy attacks and attack loopholes, use blocking and rolling to fight and combine fast and slow attack methods during combat to effectively avoid damage and maximize stamina Deal maximum damage to bosses.
Guard Counters
A new way of fighting has emerged in Elden Ring Runes, after blocking an enemy attack, use R2 when safe to execute a ward counterattack, these wards can perform a deadly attack with R1, dealing massive damage and breaking the armor of smaller enemies.
what is Super Armor
This is the armor equipment that bosses and enemies automatically generate when they take damage R1 can be a fatal blow, and the attack speed is faster and safe. The R2 attack has higher armor damage. Since the super armor will regenerate, it needs continuous and stable Damage, and R1 continuous and stable output, using an R2 attack when the boss collapses is a good way to defeat the boss.
If you want to maximize damage output, you can hold the weapon in both hands, hold down Triangle" or "Y", then tap R1 or L1 to hold the right hand with both hands, the attack with both hands will have more combo action and armor damage. Attack At the same time, you can defend by blocking with both hands, Proper use of the Guard Counters will have an unexpected effect on the battle.
The Role of the D-Pad
The selection of equipment and the casting of spells is inseparable from the use of the D-Pad. Press and hold the D-Pad for quick access. The top of the D-Pad can cycle through the currently selected spells, and you can browse your weapons and equipment by pressing left or right, and replace them with suitable Weapons and spells can help end battles quickly.
Die
If you die, your runes will all drop, which can be retrieved using the compass. Of course, you can also be resurrected, and both the Land of Grace and the Stake of Marika can resurrect you. If you choose Stake of Marika to resurrect, it is possible to resurrect in a difficult area or an area close to the boss, but the resurrection in Stake of Marika reduces the difficulty of collecting runes, so if you don't want to move on, it is better to resurrect here Good choice.
When you're in trouble in the game, you can seek out Furlcalling Finger Remedies, and when you consume them, you can see other players' summoning signs and call for help. Or the summoning pool located in the key area of the summoning place can also access the summoning signs of other players, and you can choose the most convenient method to seek help.
In this post, we’ll be checking out exactly how armor functions and just how it interacts with additional physical damage reduction.
Armor can be a defensive stat in POE Currency that's typically situated on the gear you could equip and it is granted from the Determination aura. Therefore, should your budget is sufficient, try and buy POE Currency for getting or crafting more excellent weapons, claws, and other items. In this way, you may defeat various monsters and bosses quicker.

Armor Function
Firstly, we should mention that should you have armor, the physical damage reduction shown on your character sheet is very redundant. That’s considering that the physical damage reduction furnished by armor is scaled in line with the total damage with the hit when compared to the total armor from the defender.
For example, for those who have ten thousand armor, therefore, you take a hit of 1000 damage, the armor would prevent 66% of the damage. But with the same 10,000 armor when you require a hit of 2000 damage, the armor only prevents 50% of the damage. Notice that the armor within this example prevented less damage up against the larger hit. For this reason, armor is a lot more effective against numerous smaller hits as opposed to a few larger hits.
Armor Calculation
Let’s please take a look at the calculation for damage reduction from armor. This equation represents the physical damage reduction offered by armor, where AR will be the total armor with the defender and damage could be the total physical damage from the hit which is taken.
Let’s consider the example from earlier. We have 10,000 armor and we’re getting a hit of a single thousand physical damage. If we plug the numbers into the equation, we can calculate the harm reduction of 0.66 recurring. We can then multiply this because of the original 1000 damage come to work out the particular damage we have been mitigating, that is 667 damage or a decrease of 66%.
Lastly, know that Overwhelm exists in poe currency for sale. This is usually a modifier that essentially allows the attacker to bypass the stated number of physical damage reductions.
What is the foremost Honkai: Star Rail Accounts Natasha build? As one of the only doctors left in Jarilo-IV’s Midgar-like Underworld, Natasha plays a pivotal role in Honkai Star Rail’s post-prologue chapters. While unlockable without cost by simply doing the story, building her in your gacha squad is just about the best move you possibly can make, as she provides impressive healing that you’ll surely have to tackle companies the roguelike Simulated Universe or Forgotten Hall challenges.
Many would assume a smaller free character, but Natasha stands among an entire roster of Honkai Star Rail characters as among the few and greatest healers among gamers – in case you don’t believe us, just look into where she falls on our tier list. However, we all do recommend saving any valuable materials from your latest batch of Honkai Star Rail codes for getting her to perform at her best. Here’s all you require for the very best honkai star rail account Natasha build.
Natasha’s adamant fascination with the people of Belobog’s Underworld is reflected in our best build choices, and not for thematic reasons! The aim is usually to make her a sustainable healer who could heal herself in a very pinch with your ex-early Eidolon and many choice max HP increasing relic gear. Her Honkai Star Rail Light Cones and Planar Ornaments are chosen to substantiate her usefulness with party-wide heals, along with some sneaky attack buffing under consideration too, in case you’re fast enough.
In the latest game meta, healers can hardly avoid Bailu’s five-star Light Cone Time Waits for No One, that when fully superimposed can increase Natasha’s max HP by nearly 30% and outgoing healing by 20%. Not only that, just about adds additional destruction of any ally’s attack to your amount of 60% of your respective last heal, a hefty DPS boost overall. If you’re stuck, we’d recommend Natasha’s canonical four-star cone, Post-Op Conversation for the most solid energy regeneration and boosted healing to be with her ultimate.
As you would possibly expect, the very best Honkai Star Rail team comp for Natasha positions her as being a primary, single-target healer, the industry necessity in compositions that are included with squishier support units like Tingyun. Aside from the obvious health regeneration she provides, Natasha also gains usage of debuff cleanse via her skill at Ascension Four, which is the perfect counter to many people's harmful effects that enemies deploy inside Forgotten Hall and Simulated Universe.
Jing Yuan is a good choice for a primary DPS. Not only does his kit retain the highest damage output inside the anime game, but the guy can also unleash that damage in a single fell swoop. However, if you would rather utilize a single-target DPS – or in case you just haven’t pulled Jing Yuan from your Honkai Star Rail banners yet – Seele is a good alternative. Bronya’s first concern should be managing the turn order for Jing Yuan so that he can reach the full limit of Lightning-Lord’s attack count stack as fast as possible. Tingyun is capable of supporting the damage output from Jing Yuan’s basic attack, and as well employ her ultimate to replenish the vitality of Jing Yuan’s own – or Natasha’s, if your team-wide heal is necessary.
Once you’ve put together the very best Honkai Star Rail Natasha build, she’s bound to be a mainstay within the team since you work on boosting your equilibrium levels in the late game. On the other hand, you would possibly want to invest in your Honkai Star Rail Stellar Jade farming guide when you’re desirous to gamble on Warps to pull companies Bailu instead.
Overloaded team comps in Genshin Impact accounts aren’t traditionally used since they’re not reliable enough. One of the main explanations why it’s challenging to use teams that mainly pinpoint the Overladed reaction is the place enemies will scatter throughout the battlefield if it occurs.
Add compared to that how important it is to find a set of two Electro and Pyro users in Genshin Impact that can synergize and build this combo. This is not easy because good off-field Pyro users can easily be reduced to only Xiangling, literally.

Raiden Shogun + Yelan + Xiangling + Bennett
The rational team can be a meta team in genshin impact accounts. With Raiden joining the National team, she's able to dish out many of the hardest damage within the span of her couple of seconds of Burst duration. When it comes to the thinking behind this team, it’s virtually chaos.
Raiden is capable of carrying the DPS while she battery and buff everyone’s Elemental Burst. Yelan can slightly buff Raiden when she’s within the field although Raiden can’t make the most of the buff Yelan grants. Finally, Bennett can be a great buffer that can take all their damage to the next stage, especially since Xiangling is competent to snapshot his buff.
Wanderer + Xingqiu + Fischl + Xiangling
There are numerous variations of team comps offering Xingqiu, Fischl, and Xiangling, but nothing comes close to including them in a team that has a driver like Wanderer. Xingqiu and Fischl may make the most of Wanderer's driving privileges their Elements into enemies and Swirl it to make a huge AoE of Electro and Hydro Elements jumping among enemies. Add to all of that the strong Elemental Burst Xiangling has each time Wanderer levitate, players are usually in for a treat.
It’s not simply satisfying to see Wanderer drive, Swirl, and manipulate these Elements to produce a literal storm, it carries a large amount of damage which can be effective in many Genshin Impact areas such as the Spiral Abyss.
Yoimiya + Zhongli + Xingqiu + Fischl
It’s an advantage to get Pyro characters to continuously trigger Vaporize reactions to be able to amplify their damage. But, to create things more spicy, players can also add a strong Electro unit to make a little bit of madness. Since Yoimiya is a Bow user in Genshin Impact, adding Fischl to her synergy with Xingqiu will result in enemies flying around in the event the Overloaded reaction is triggered.
With Vaporize, Electro-charged, and Overload, this team comp is capable of carrying players through hard content such as Spiral Abyss in Genshin Impact. To add to all of the goodness this team has, Zhongli will be capable of shielding Yoimiya and shredding enemies' potential to deal with all three core Elements accessible in this team comp.
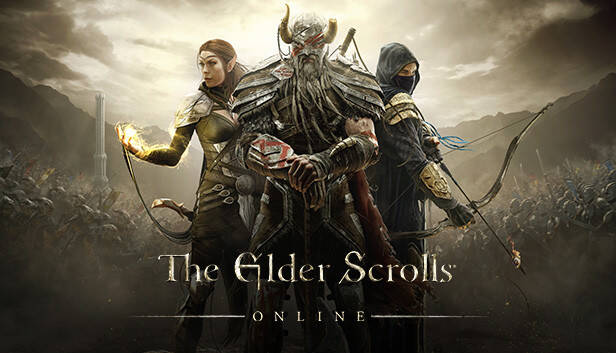
The latest chapter of The Elder Scrolls Online Gold, Necrom, is unapologetically gothic. Beyond the new Arcanist class, which wields dark green energy utilized by the unknowable Apocryphal realm, what's more, it features a story dripping with gloom and malaise. In its opening stanza, you match the Cthulian Daedric Prince, Hermaeus Mora, who laments a loss of revenue of power, as well as an incoming crisis of fate that will lead to the end of the planet. I suspect it was this booming declaration that have me feeling existential – for the reason that the more I played through Necrom, the greater I thought concerning the end.

More specifically, the finish of The Elder Scrolls Online.
This MMORPG is now bolstered by the passionate, long-term fanbase who may have invested a lot of time into roaming across Tamriel, taking up fetch quests, meeting its cast of weird and quirky characters, and diving into great tomes of lore.
It’s currently one of the most popular MMOs on this planet, and it is success may be bolstered with every new expansion pack. The end isn't coming for The Elder Scrolls Online sooner – even so, the grim reality is the conclusion is coming. It’s within the nature of MMORPGs.
he elder scrolls online gold was one of the primary games I covered as a professional journalist. In 2017, I interviewed developer Rich Lambert regarding the ongoing success of the game, and in some cases then, its longevity would have been a topic of conversation. ‘We ought to keep the lights on,’ Lambert said at that time, in reaction to questions in regards to the game’s monetization via loot boxes and further chapters. ‘It’s not cheap to maintain your game ready to go.’
The same can probably be said for any modern MMO. It’s expensive to maintain lights running, and continued monetary support is required for game servers to stay life, for developers to help keep creating new content, and for top reasons to come back.
A deficiency of longevity is a type of fear for ongoing and live service games, and particularly MMORPGs. In recent years, we’ve seen many burn out and disappear, even those that have passionate fanbases – Marvel Heroes, Pirates in the Caribbean Online, Warhammer Online: Age of Reckoning, and Club Penguin for starters modern examples.
The core difference is that The Elder Scrolls Online maintains its player base with strong new story chapters every couple of months – but at nine years of age, it’s already defying the trends of its genre. At nine yrs old, it’s practically a veteran, crippled as they age.
There are fellow defiers within the MMORPG realm – like World of Warcraft and Old School Runescape because both versions have escaped the burden of time by playing on nostalgia, adding new content, and fostering feelings of connection with their communities.


