qbsenterprisesupport's blog
Firewall is an essential application that saves the system from various threats such as malware, viruses, and various other unwanted programs. Sometimes the firewall blocks the internet access required to run QuickBooks and the company file. This type of error is much seen when the user runs QuickBooks in the multi-user mode. Keeping all the facts in mind, we have come up with this blog post, where we have tries to discuss the steps to configure firewall and security settings for QuickBooks desktop. Thus, keep reading this post for further information.
You can also get in touch with our QuickBooks support team via our toll-free number i.e. 1-800-761-1787, and our team will help you in configuring the firewall.
Step 1: Configure exceptions and ports to QuickBooks firewall manually- Click on start menu and search Firewall
- Select windows firewall
- And then select advanced settings
- The next step is to right click the inbound rules and then select new rule
- Click on port and then select next
- After that the user needs to check the TCP option and type in specific ports required for QuickBooks year version.

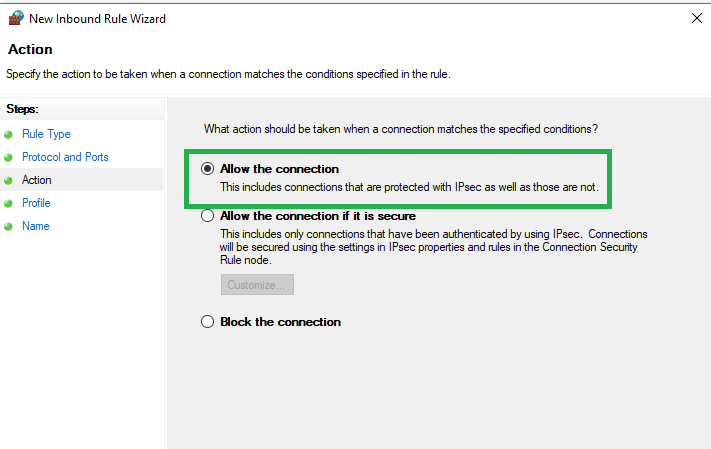
- Now hit next and then ensure to allow the connection and hit next again
- Also ensure to checkmark the profiles and click on next

- The user is then required to name the rule such as QBPorts, and hit finish when done
- The user should now repeat the steps for the outbound rules
- The last step is to try opening QuickBooks desktop again in the multi-user mode
To configure firewall ports automatically you need to follow the steps to download and use QuickBooks File Doctor tool. This tool will automatically open your firewall ports and configures your Windows firewall.
ConclusionWith this blog, we have tries to guide the user with the steps to configure firewall for QuickBooks desktop. However, in case of any query or if you are facing any sort of error, then feel free to contact our QuickBooks enterprise support team via our toll-free number i.e. 1-800-761-1787, and our team will help you in fixing the issue. We are a hub of technocrats who work round the clock to provide the best possible support services to all QuickBooks users.
QuickBooks error code 3371 is one of the commonly encountered errors. When the QuickBooks user re-configures the desktop or setup the QuickBooks company file for the very first time, then the user can face this kind of issue. Also, this kind of error could be seen, when the entitlement DataStore.ecml file gets damaged, which contains the license properties of the QuickBooks. This error code comes up with an error message stating “QuickBooks could not load the license data.” We have come up with this post, where we will be discussing the ways to fix the QuickBooks error code 3371.

Thus, make sure to read this post till the end, or you can also get in touch with our QuickBooks error support team via our toll-free number i.e. 1-800-761-1787. Our team will provide the best possible support services round the clock.
At the time you have activated or open QuickBooks Desktop, you might see one of the error messages on your screen:
- Could not initialize license properties. Error 3371: QuickBooks could not load the excess data. This may be caused by damaged files.
- Could not initialize excess properties. [Error 3371, Status Code -11118] QuickBooks could not load the excess data. This may be caused by damaged files.
- Could not initialize license properties. [Error: 3371, Status Code -1] QuickBooks could not load the excess data. This may be caused by damaged files.
- Error code 80029c4a can be one of the causes bottom the situation of QuickBooks error 3371
- QuickBooks desktop performance issues
- Antivirus disruption can also be one of the triggers
- That factor causing this error can be if QuickBooks stopped working
- Also crash com error can be a reason
- The user can also cause similar error if the half done or unsuccessful windows updates are present
- Damaged MSXML components can also end up in error code 3371
- Issues with printing, emailing, or saving as a PDF from QuickBooks desktop
Follow the below given methods to resolve QuickBooks error 3371: Status code 11118:
Method 1: Remove the ecml fileThe user can remove the ecml file to get rid of this error code. The steps remove the ecml file are as follows:
- The very first step is to press the Windows + R keys
- After that, the user needs to enter or copy it at C:\ProgramData\Intuit\Entitlement Client\v8
- The next step is to spot the window explorer
- Followed by removing the ecml file and then selecting the delete option
- And then close the windows option
- The last step is to run QuickBooks and then register the product
- First of all, Close QuickBooks desktop.
- After that download and save the QuickBooks tool hub on your system.
- Once the file successfully downloaded, hit a click on exe file to run it.
- Now follow the on-screen steps to install and agree to the terms and conditions.
- Once the tool successfully installed on your computer, click on the created icon to open tool hub.
- In the QuickBooks Tool Hub, choose Installation Issues tab.
- After that choose 3371 Error Fix.
- Select OK button.
- Finally start the QuickBooks desktop and open your data file.
QuickBooks clean install tool is designed and developed by Intuit in a way to create plenty of files and saves essential cache memory as well. This tool helps in cleaning and removing the errors that a user is facing while using QuickBooks. The user can use this tool when the software keeps on showing installation errors even after many installation attempts. Also, the clean install tool can be used when the error appears while a user on the network tries to open more than one company file. In today’s post we are going to discuss the use of QuickBooks clean install tool and many more things. Thus, continue reading this post and check out the ways to make the best of this tool.
For more details, you can get in touch with our QuickBooks enterprise support team via our toll-free number i.e. 1-800-761-1787.
Steps to install and use QuickBooks clean install toolStep 1: Uninstalling QuickBooks desktop- First of all, click Windows + R keys and open the Run command, followed by typing in the Control panel and hitting OK
- Move to programs and features and then hit uninstall a program option
- Click on QuickBooks desktop and select uninstall.
- Move to the file location and then carry out the on-screen instructions
- After that click on I accept
- And then click on clean install tool after selecting installation issues
- And then the tool will fix the issue on its own
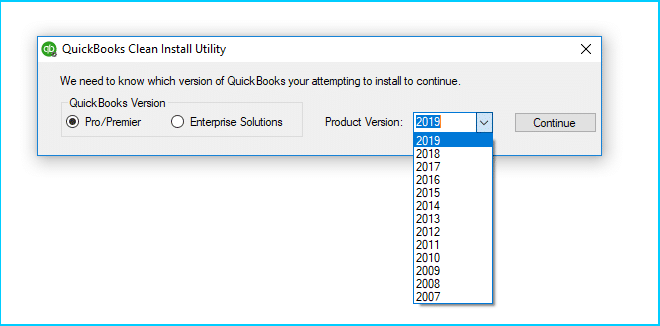
- The user should insert the CD of QuickBooks desktop and carry out the onscreen instructions
- And then enter the product and license number
- Carry out the on-screen instructions
- Hit next
- Also, the user needs to select the type of installation and then select next and install option
- And lastly run the software
This brings us to the end of the post, and we hope that the information shared above will help you in making the best of QuickBooks clean install tool. For more details do not hesitate in calling us at our toll-free number i.e. 1-800-761-1787, and our QuickBooks desktop support team will ensure to provide you with the best possible support services round the clock.
Are you facing QuickBooks error 6000, 77 and unable to get rid of it? Well, the QuickBooks error code 6000, 77 is one of the most common and at the same time one of the most critical errors that can cause serious damage to the software. This error code comes up with an error message stating:

We're sorry. QuickBooks encountered a problem. Error codes: (-6000, -77).
This error is often seen when the file is stored in the wrong folder. This error usually plagues the system, when the user does not enough of permissions to gain access to any QuickBooks file.
This post is written with an aim to provide the user with the best possible steps to fix the QuickBooks error 6000 77 issue. For more details, the user can get in touch with our experts and we will be there to assist you.
Factors leading to QuickBooks error 6000, 77- Not enough authorization to the server system
- Company file is damaged or corrupted
- QuickBooks not updated to the latest version
- Mapped drive is referred to for opening the company file
- If the company file trying to open is missing or damaged
- Company file being stored on external storage
Following are the quick steps to resolve error code -6000, -77 from your QuickBooks desktop:
Step 1: Recreating the damaged folder to fix the error- To open windows explorer, the user needs to press windows + E keys and move to the C:\ drive of the system
- After that, the user should craft a new folder in the C: drive and then name it QBtest123
- Open the folder that the company file is located
- And then right click the .qbw file and then click on the copy from the drop-down list
- After that, the user will have to paste the file into the newly created files
- And then set the windows access permissions
- The last step is to open QuickBooks desktop and then open the file from the location.
